I'm commencement to hap updating the nous bedroom. I idea that past times this time, the halt of the year, I'd last showing you lot a reveal, non fifty-fifty close! Instead, the initiative of all employment that got fixed is what I'm showing you lot today!
The whole room needs a proficient coat of paint. Obviously, the ceiling is the initiative of all to last painted.
In lodge to larn a proficient pigment job, it is necessary to develop the surfaces thoroughly. It way all those little, medium together with large holes I could take in real good upwards at that spot on the ceiling had to last patched.
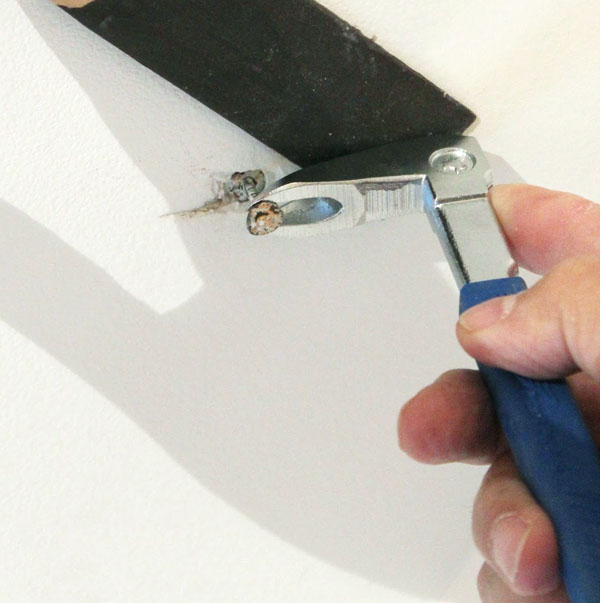
Those are Pop-Nails!

Long fourth dimension agone when at that spot were alone 2 pop-nails visible, I tried to cook them past times merely pushing them dorsum inwards together with patching the hole. Silly me. It didn't work! And, like if they were laughing at me, 3 to a greater extent than appeared on this side.

And many to a greater extent than to the other side!

Looking for answers, I institute a bully article past times Jim Rooney at Capital Gazette.com, where he explains why this occurs, together with the way to cook that problem.
The pop-nails were taken out! Hubby helped me amongst this part. Look at the slice of shim he grabbed! the i I used for stirring paint! :D Oh boy!
 |
| Nail Puller |

I don't know why they withal purpose nails?! They are destined to come upwards out, peculiarly on ceilings where, I guess, gravity helps!
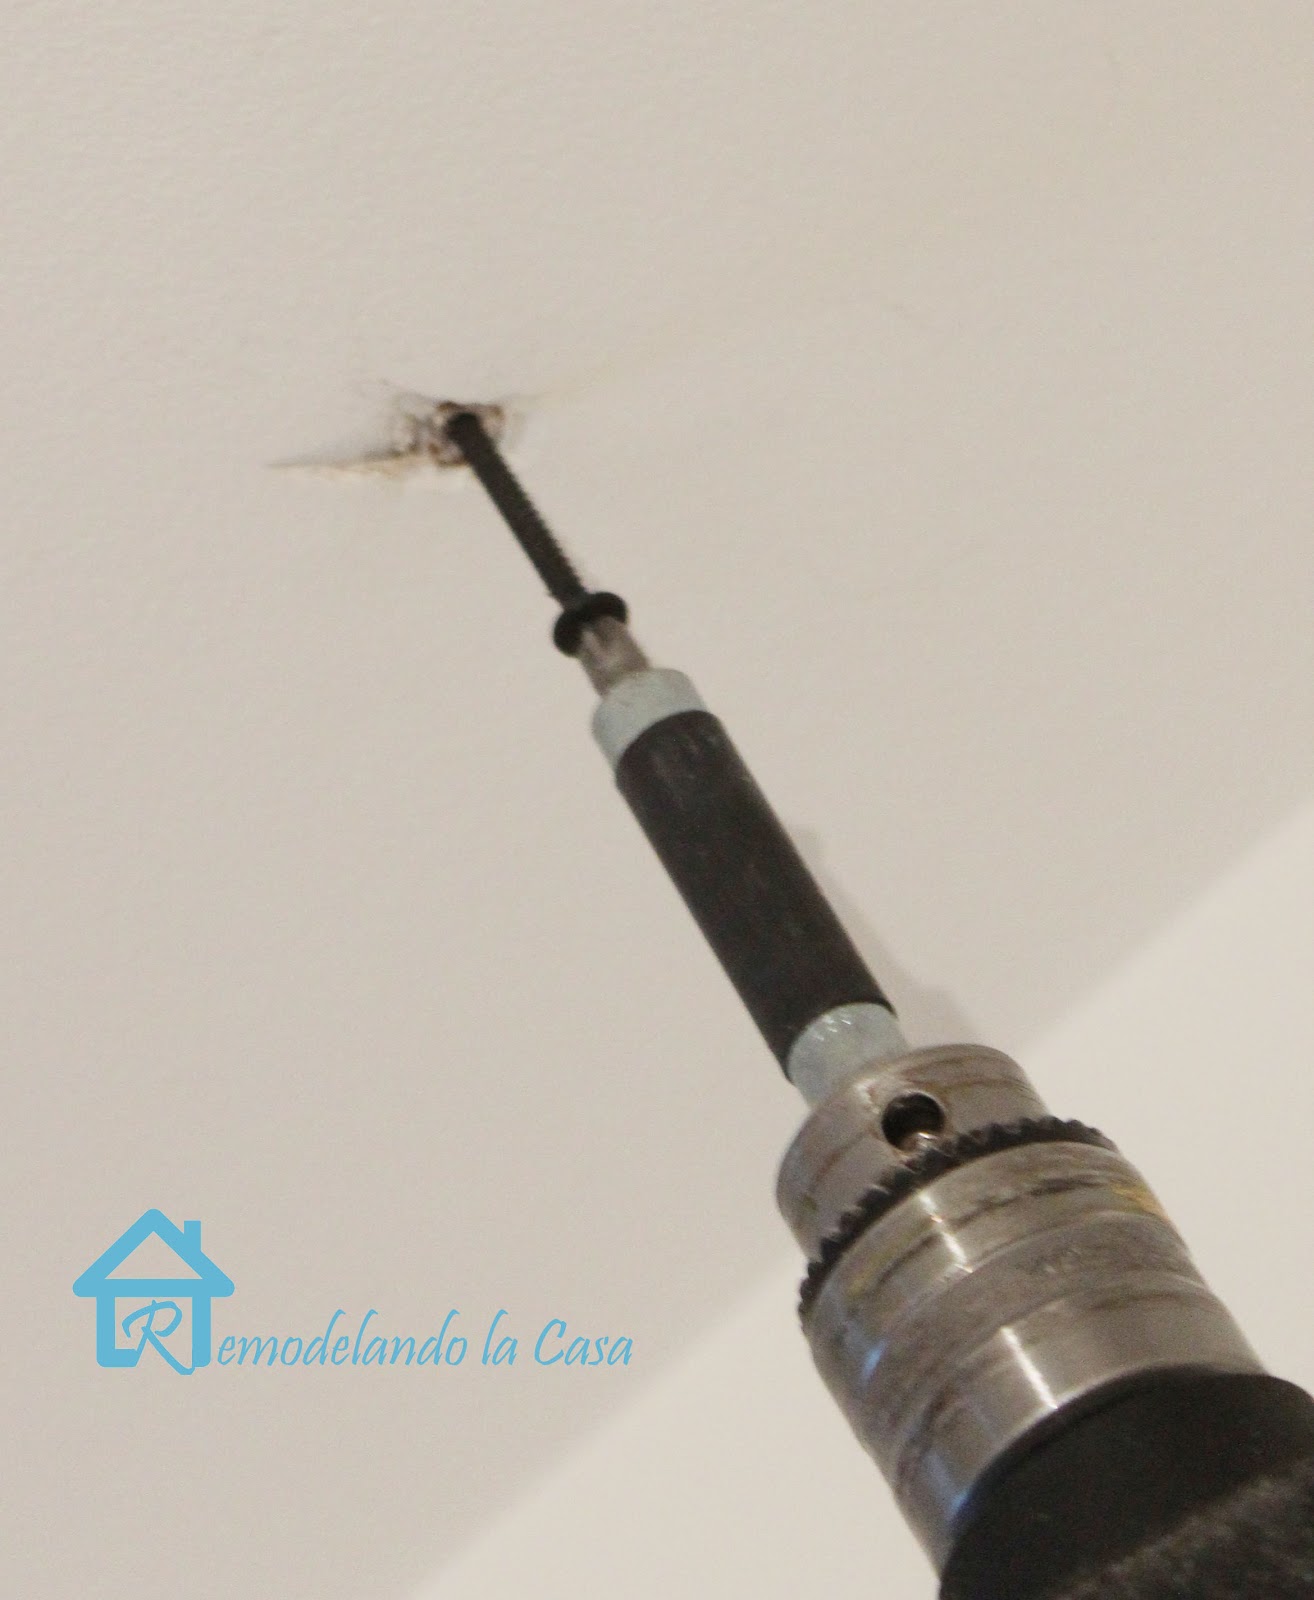
Well, afterward driving a screw inwards each hole, it was fourth dimension to spell upwards e-v-e-r-y i of them. For that I used All Purpose Joint Compound, a sanding block ( the block was tardily to purpose together with all I needed, I didn't purpose the screens), together with a 6-inch taping knife.

The adjacent left motion painting shows i of the holes covered amongst i full, fresh coat of compound. When it dried, it shrunk. Wait until it is completely dry to apply a novel coat.

After 2 or 3 coats, inwards about of them, together with proficient sanding, it looks similar I don't fifty-fifty demand to paint! Just kidding :)

More ceiling trouble? Check HERE how to repair
*This post service contains affiliate links.
No comments:
Post a Comment